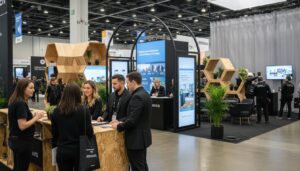
Step-by-Step Guide to Modular Booth Setup Success
Every year, american exhibitors invest over $24 billion in trade show displays, yet many struggle to create booths that truly stand out. The right booth layout not only draws attention but also shapes how visitors perceive your brand and products. With smart planning and a step by step approach, you can transform any exhibition space into a memorable marketing platform that maximizes impact and visitor engagement.
Table of Contents
- Step 1: Assess Your Space And Plan Booth Layout
- Step 2: Organize Components And Prepare Tools
- Step 3: Assemble Booth Structure Following Design
- Step 4: Integrate Branding And Display Elements
- Step 5: Test Booth Stability And Finalize Setup
Quick Summary
| Key Point | Explanation |
|---|---|
| 1. Assess and Plan Layout | Begin with accurate measurements and plan your booth layout strategically to ensure effective branding and visitor flow. |
| 2. Organize Booth Components | Prioritize the organization of booth components and tools for an efficient setup; use labeled containers and a toolkit for seamless assembly. |
| 3. Ensure Structural Stability | Conduct thorough stability tests on all connections and components, confirming that the booth is secure and viable for a busy trade show environment. |
| 4. Integrate Branding Elements | Place high-quality graphics and interactive displays prominently for maximum visibility, ensuring they align with your overall design and messaging. |
| 5. Finalize Setup Verification | Before the event, verify all elements function properly, check for obstructions, and ensure graphics are correctly displayed for a polished appearance. |
Step 1: Assess your space and plan booth layout
Successful trade show participation starts with smart booth layout planning. Your goal is to transform your allocated exhibition space into a strategic marketing platform that captures attendee attention and communicates your brand effectively.
Begin by obtaining precise measurements of your designated booth area. Most trade shows provide detailed floor plans and specific spatial dimensions, which you should review carefully. Trade show booth planning strategies recommend creating a scaled drawing that includes exact booth dimensions, noting any potential restrictions like pillar placements, electrical outlets, or nearby booth boundaries that might impact your design.
Carefully consider traffic flow and visitor interaction zones when mapping out your layout. Position key marketing elements and product displays to maximize visibility while creating natural pathways for attendees. Avoid cluttering your space with excessive furniture or barriers that could impede movement. Your booth should feel inviting and open, allowing potential clients to move smoothly through your presentation area.
Pro tip: Always request a digital or physical floor plan from event organizers and create multiple layout mockups before finalizing your design. This preparatory work helps identify potential spatial challenges and ensures your booth looks professional and strategically organized.
With your initial space assessment complete, you are now ready to move on to selecting modular booth components that will bring your vision to life.
Step 2: Organize components and prepare tools
Streamlining your booth setup begins with meticulous component organization and strategic tool preparation. This critical stage transforms your carefully planned layout from concept to physical reality, ensuring a smooth and efficient assembly process.
Exhibition booth assembly techniques recommend creating a comprehensive inventory of all modular components before transportation. Sort your materials into clearly labeled containers or cases based on assembly sequence. Group similar items together: structural frames in one set, graphic panels in another, and electrical equipment in a separate collection. This systematic approach minimizes setup time and reduces the risk of misplacing critical pieces during installation.
Prepare a dedicated toolkit that includes essential items like cordless drills, adjustable wrenches, level meters, zip ties, safety gloves, and backup hardware. Include spare connectors and fasteners specific to your modular system. Professional exhibitors often create a detailed checklist that maps each tool and component to its specific placement and function, which acts as both a setup guide and a final verification system.
Pro tip: Take high resolution photographs of your booth components during initial unpacking. These visual references can serve as quick assembly guides if installation instructions are misplaced and help troubleshoot any complex connection points during setup.
With your components systematically organized and tools prepared, you are now ready to begin the actual booth construction process.
Step 3: Assemble booth structure following design
Transforming your meticulously planned booth design into a physical structure requires precision, patience, and a systematic approach. Your goal is to create a stable and visually compelling booth that accurately reflects your brand and marketing objectives.
Modular trade show booth construction begins with establishing a solid foundation. Start by laying out your base framework, ensuring each structural component is level and securely connected. Use your level meter to confirm perfect alignment of foundational elements. Connect modular frame pieces methodically, following the manufacturer’s specific connection guidelines. Pay close attention to joint connections, making certain each segment locks firmly and creates a unified, stable structure.
Proceed with vertical elements next, carefully installing support columns and primary structural frames. Verify each section’s stability before adding subsequent components. For graphic panel installations, use gentle pressure and aligned mounting points to prevent warping or misalignment. Double check all connections periodically during assembly to maintain structural integrity and prevent potential failures during the exhibition.
Pro tip: Work with a partner during assembly when possible. A second set of hands can help manage larger components, confirm alignment, and reduce the risk of accidental damage or misassembly.
With your booth structure now assembled, you are prepared to move on to the final aesthetic and functional detailing.
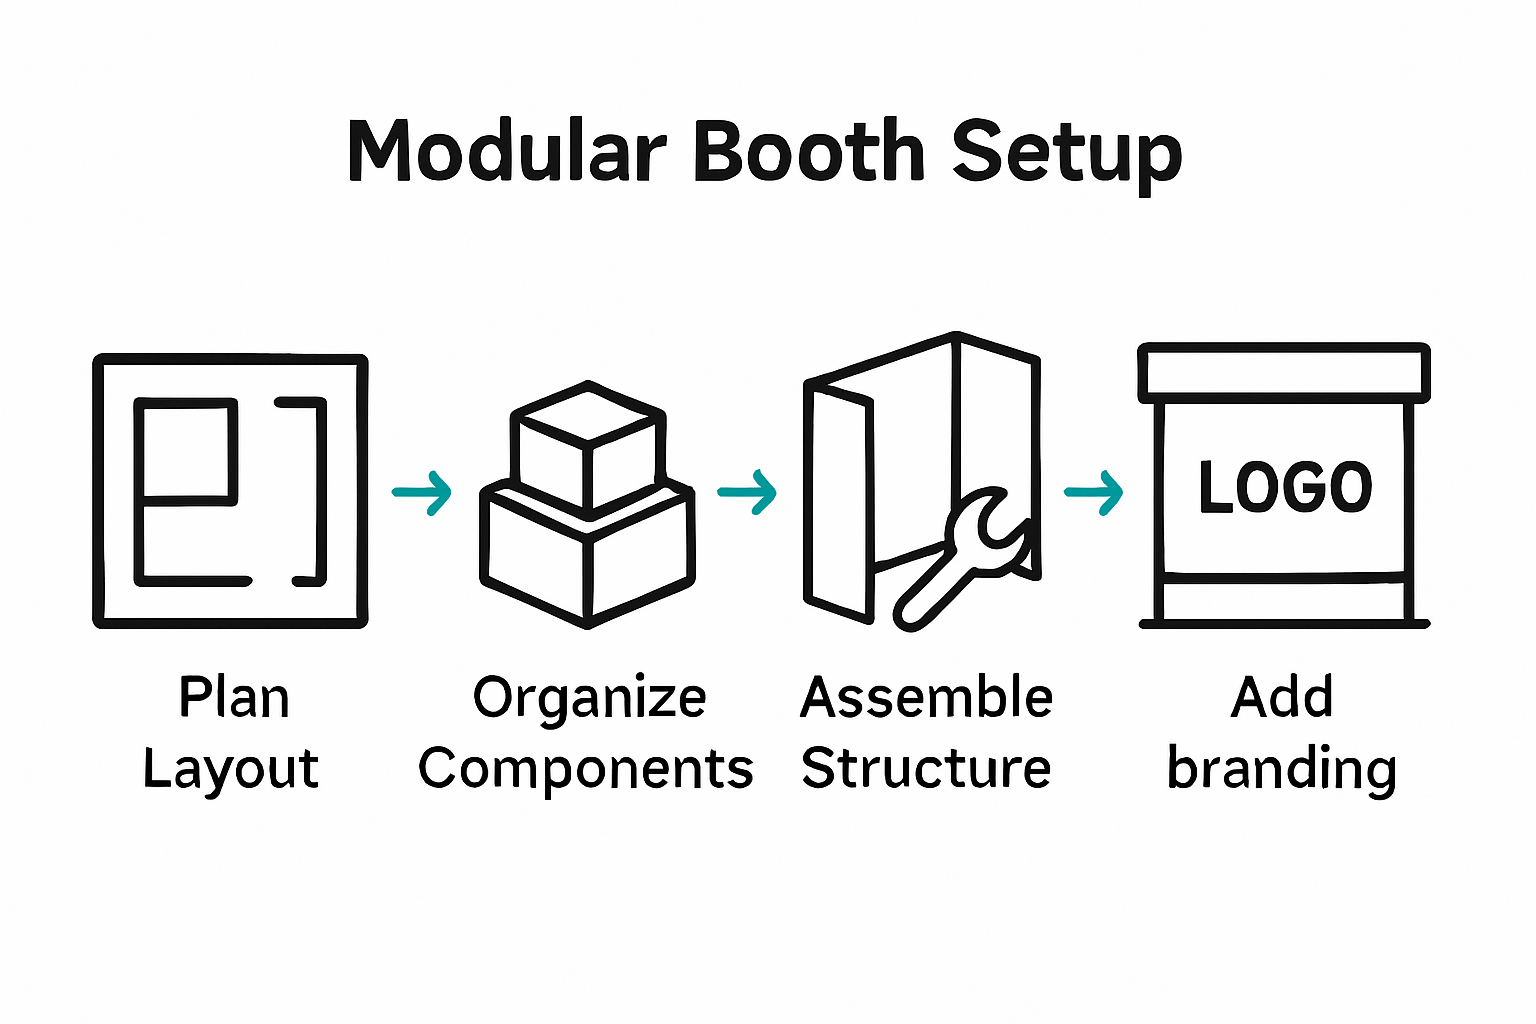
Step 4: Integrate branding and display elements
Transforming your booth structure into a powerful marketing platform requires thoughtful integration of branding and display elements that capture attention and communicate your company’s unique value proposition. This critical stage turns your modular framework into a compelling visual narrative that speaks directly to potential clients.
Custom booth design strategies recommend starting with high quality graphic panels that align perfectly with your structural framework. Carefully position your company logo, key messaging, and visual brand elements to create maximum visual impact. Ensure graphic panels are tension mounted for a smooth professional appearance, eliminating wrinkles or misalignments that could detract from your brand image. Consider using backlit panels or strategically placed lighting to enhance visual depth and draw attendee focus to critical marketing messages.
Incorporate interactive display elements that encourage attendee engagement. This might include touchscreen demonstrations, product sample stations, or multimedia presentations that showcase your company’s innovations. Select display technologies and presentation methods that complement your booth’s structural design while providing clear pathways for visitor interaction. Arrange product displays and demonstration areas to create natural traffic flow, allowing visitors to move seamlessly through your marketing experience.
Pro tip: Create visual hierarchy in your branding elements by using varied scales and strategic positioning. Your most important messages should be largest and most prominently displayed, guiding attendees eyes exactly where you want them to look.
With your branding and display elements strategically integrated, you are now ready to prepare for final booth setup and exhibition readiness.
Step 5: Test booth stability and finalize setup
The final stage of your booth preparation involves comprehensive stability testing and meticulous setup verification. This crucial process ensures your exhibition space is not only visually impressive but also structurally sound and ready to withstand the dynamic environment of a trade show.
Booth fabrication best practices recommend conducting a systematic stability assessment. Begin by carefully testing each structural connection, applying gentle pressure to verify that all frame joints and modular components are securely fastened. Use your level meter to confirm that vertical supports remain perfectly aligned and that no structural elements wobble or show signs of weakness. Pay special attention to areas with potential stress points such as connection nodes, graphic panel mounting areas, and display attachment zones.
Proceed with a comprehensive functionality check of all integrated elements. Test interactive displays, ensure electrical connections are secure, and verify that lighting systems operate correctly. Simulate potential visitor traffic patterns by walking through your booth space multiple times, identifying any potential obstructions or areas that might impede smooth movement. Check that graphic panels are correctly tensioned, graphics are crisp and undamaged, and all visual elements align precisely with your intended design.
Pro tip: Take photographs of your fully assembled booth from multiple angles. These images serve as valuable documentation for post event analysis and can help troubleshoot any setup challenges in future exhibitions.
With your booth stability confirmed and final details perfected, you are now prepared to make a powerful impression at your upcoming trade show.
Achieve Modular Booth Setup Success with Expert Support
Setting up a modular booth can be a complex challenge. From precise space assessment to organizing components, assembling structures, integrating branding, and ensuring stability, each step demands careful planning and expert execution. The pain points are clear. You want a professional, visually compelling, and stable booth that communicates your brand effectively while making setup and teardown stress-free. These goals resonate throughout the detailed steps in the article.
That is where Adam Expo Stand brings unmatched value. With specialization in custom and modular booth solutions, we provide end-to-end services that cover everything from conceptual design and 3D visualization to fabrication, on-site assembly, and logistics support. Our turnkey approach eliminates setup guesswork so you can focus on engaging your audience. We also emphasize sustainable options like reusable modular stands and rentals.
If the guide inspired your next trade show strategy discover how our exhibition stand design and fabrication expertise can turn your plans into reality. Benefit from personalized project management and support that ensures your booth is not just structurally sound but also a true reflection of your brand. Don’t let the complexities of booth setup hold you back visit Adam Expo Stand today and start building your impressive trade show presence with confidence.
Frequently Asked Questions
How do I assess my exhibition space for modular booth setup?
To assess your exhibition space, obtain precise measurements of your allocated booth area. Review the trade show’s floor plan to identify restrictions like pillars or electrical outlets, and create a scaled drawing to visualize your layout before starting construction.
What components should I organize before setting up my booth?
Organize components by creating a comprehensive inventory of all modular pieces and sorting them into labeled containers. This way, you can minimize setup time and avoid misplacing critical items during assembly.
How do I ensure my booth structure is stable during assembly?
To ensure stability, carefully test each structural connection and use a level meter to verify alignment. Apply gentle pressure to each joint during assembly to confirm that all components are securely fastened and stable.
What are effective ways to integrate branding elements into my booth?
Effective integration of branding involves using high-quality graphic panels and positioning your company’s logo prominently for visibility. Choose backlit panels or strategic lighting to enhance visual impact, making sure that your key messages are clearly communicated.
What should I check during the final booth setup?
During the final setup, conduct a systematic stability assessment of all components and test interactive displays for functionality. Ensure lighting systems work correctly, and walk through your booth to identify any potential obstructions to visitor traffic.
How can I prepare for future trade shows after my booth setup?
To prepare for future trade shows, take high-resolution photographs of your fully assembled booth from multiple angles for reference. Document successful strategies and any challenges faced to improve your booth setup process for next time.